THE MISSION:
To improve the detection of inserted cartridges and to create a system that allows for differentiation between cartridge types
MY ROLE:
Ideation, prototyping, concept testing, sub-assembly integration, materials sourcing
FOCUS AREAS:
Electro-mechanical design, design for manufacturing
The Insertion Sensor

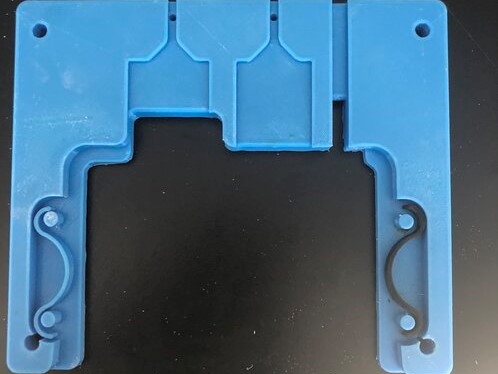
the registration plate
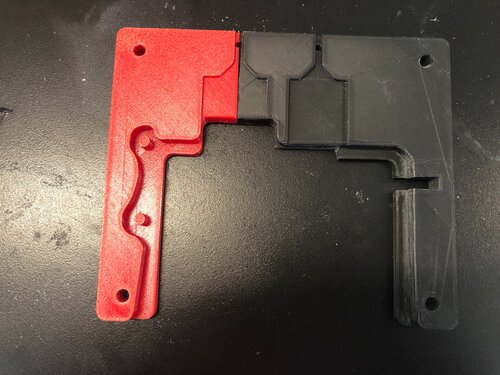
The original design used a tight fit between the cartridge and the registration plate to guide and hold the cartridge in place. However, this required quite a bit of force to insert and remove and did not provide the user with any confirmation that the cartridge had been fully inserted into the back to the system. The clamping system that is used to hold the cartridge in place once inserted has a very small margin and requires the cartridge to be inserted to the exact same position each time. Rather than relying solely on the sensor to confirm a correct insertion, I decided to explore ways to mechanically both guide the cartridge to the correct position as well as provide the user with some form of feedback.
This sensor tells the system that a cartridge has been inserted. I started out with a photoresistor, but it ended up being too sensitive to ambient light so I switched to using a photogate. It doesn’t register the translucent cartridge and a piece of electrical tape is used to block the sensor. It ended up being highly sensitive and working very well. The final version uses multiple of these sensors to differentiate between various cartridge types.
I decided that a spring could be a good way to both guide the cartridge and provide a nice tactile click upon insertion. To test the spring, rather than print the whole piece again, I decided to print only the left side. I then cut the part that I already had from testing the sensor and combined the two.
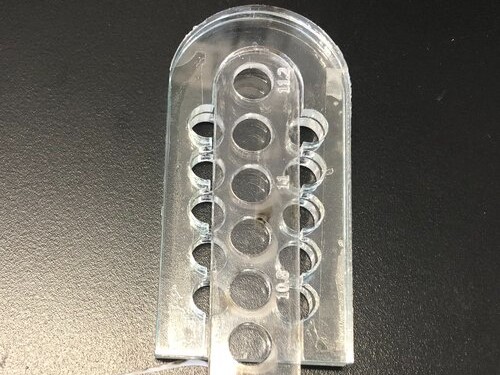
To get an initial sense of where the guide pins should go, I laser cut this test fit jig. The center piece tests the diameter of the circle and the outer piece tests the distance from the pin to the edge of the “cartridge” (in this case being the center piece)
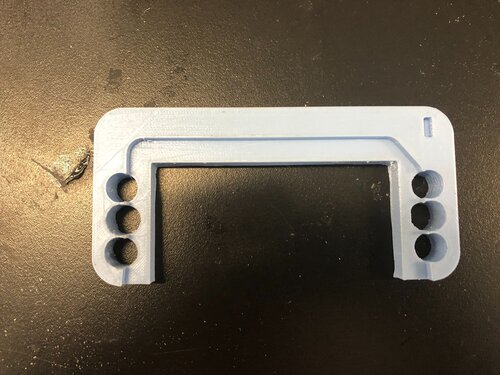
In order to fine tune the level of engagement between the self-centering pins and the cartridge, I made this piece which fits into a smaller cartridge than the one we would be using in the final version. Because the engagement would be the same regardless of the cartridge size, I thought this would be a good way to save on plastic.
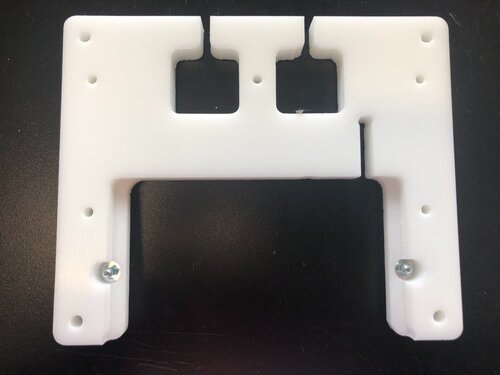
Once the placement of the spring pins was finalized, I decided to mill the mounting piece out of Delrin rather than 3D printing it to minimize the amount of friction between the mount and the cartridge.
This worked pretty well, but I wanted a bit less wiggle so I added a second spring and moved them closer to the front. I also played around with the spring’s material. The one on the left is PLA and the one on the right is a nylon/carbon fiber combination.
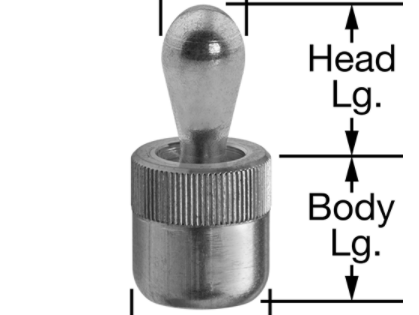
While this method worked fairly well, it was likely that a 3D printed spring would lose it’s strength over time. Because of this, I decided to use these spring loaded guide pins.

.png)


